Large Flowers with Chart Paper
Hey everyone,
Hope you all are doing amazing
today. Today, I am going to talk about DIY flowers, which by the way is my favorite
DIY of all times. Why? Because it is very easy to make, very easy to use for SO
many things, and is so affordable for anyone as it only uses paper and glue.
Yes, it is that cheap to purchase. Besides, you can use these as center pieces
for tables, as backdrops, you can use this to decorate your party hall and
pretty much anything. You can even make these at a small scale and use it for a
hairband. The ideas are unlimited. If you love DIY crafts, then you are going
to love this.
Disclaimer: None of the videos
shared on today’s blog belong to the Crafty Blogger and we do not take any
credit for the creativity displayed by the amazing video bloggers. Their
efforts and ideas must be appreciated.
All you need for this DIY craft:
- Chart paper in different colors
- Glue
- Some crepe paper to make the center part of the flower
- Scissors, pencil, eraser and sharpener (the basics)
- If you are good at drawing, you won’t be needing printable patterns for the petals. Otherwise, you can find on the internet many printable patterns to help you draw a petal perfectly.
STEP 1:
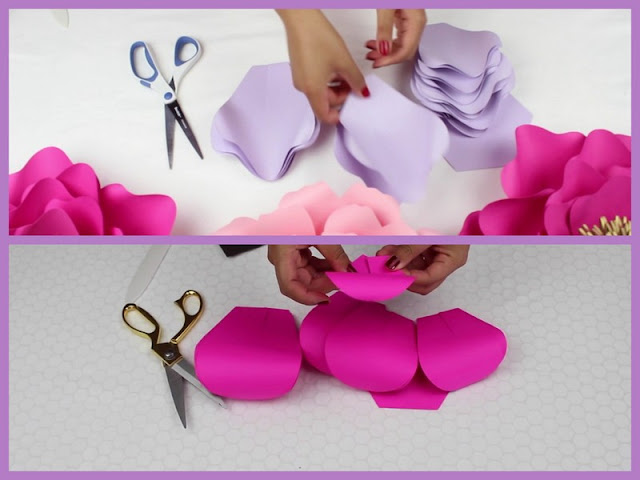
Take a chart paper, and draw 5
sizes of the same shape of a petal. Use these as sample for the rest of the
chart papers as you would need at least 3-5 layers of petals with 5 petals of
each size to make your large sized flower.
STEP 2:
Now that you’ve arranged these
piles of petals separately, take on petal at a time, and from the base of the
petal, use a scissor to form a small cut. Repeat this for every petal.Once this is done, use a pencil to curve the edges of each petal.
STEP 3:
Once you have slit the petals,
you need to put glue on one of the 90 degree angled edge and stick the other
end over it. This will give the petal a certain curve, making it seem more
real. Repeat it for the rest of the petals as well.
STEP 4:
After you have completed step
three, you need to start putting the petals together now. Begin with one sized
petals at one time. Once all the sized petals have been glued together, use
sufficient amount of glue to bind these bunches together forming a beautiful
flower. The best way to go about this step is to cut a small circle of the
chart paper, and start pasting the largest sized petals first, beginning from
the outter edge of the circle. The circle will form a base for the flowers and
will make it easier for you.
TADA! Your beautiful flower is
ready to be used. To decorate the center of the flower, you can use crumbled
crepe paper, or cut the chart paper in a comb like design, roll that piece of
chart paper and paste it in the center of the flower.
Hope you all learned something
new today. Time for me to sign off now, until next time, stay crafty!
The following links will give you
more ideas about making DIY flowers.


Comments
Post a Comment