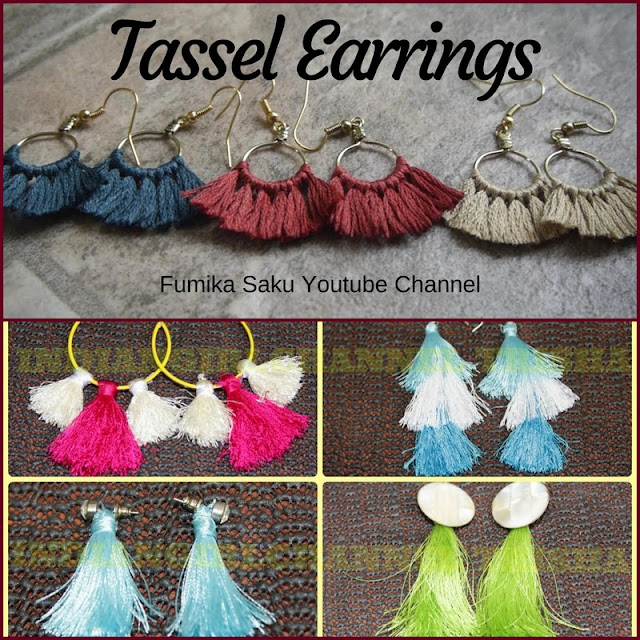
Tassel Earrings
Hey Everyone,
Hope you all are doing amazing today.
Today, we are going to learn a type of earring which is super inn these days
and can give your overall outfit a perfect touch. Tassel earrings. Tassel
earrings are so easy to make and can be made under a very limited budget. A few
things that you might need for this DIY craft are:
·
- Old hoop earrings. You can even buy new ones as they won’t cost you a lot.
- The earring hooks to make different styles of tassel earrings other than the hoop.
- Beautiful colors of thread. Silk thread would be the best for this DIY as it adds a little shine to the earrings and makes them look very formal-ish. You can also use embroidery thread if you like. It will cost you cheaper in comparison to the silk thread.
- The basics for every DIY crafts; scissors, glue and maybe some tape.
1. Hoop tassel earrings
2. Earring hook tassel earrings
3. Studs tassel earrings
Depending on how you like to wear
earrings, you can choose one of the types mentioned above and make the tassel
as we will talk about in the next stages of the article. The main part of this
DIY is to make the tassel. So here is how we do it.
STEP 1:
First of all, you need to cut the
thread that you have according to the length of the tassel which you want. It
can be as long as you like. If you don’t want them to be very long, you can
always keep the tassels short and cute. Once you have decided on the length of
your tassels, you need to cut the strings double to length as you will fold
this piece of string to make one tassel.
For one set of tassel, again, the
choice is up to you how thick you want your tassel to be. For instance, you can
make 6-10 strings for a single earring hook or stud earring tassel. However, if
you are making a tassel hoop earring, you might need a few more sets of strings
so to cover the hoop.
STEP 2:
The most important step for
making a tassel earring is the knot. Take the set of strings which are double
the size of the original length that you want your final tassel earring to be.
Hold it from the center.
The technique will vary for a
hoop earring and an earring hook.
For a Hoop earring:
Once you’re holding the string
set from the center, fold it in half, keeping the hoop in the center of the
folded strings, you need to bring the open ends through the closed end (which
is where you are holding the strings from) and pulling the closed end from the
other side till the string forms a tight knot over the hoop. Repeat these steps
to create more tassels on the hoop. Gently trim those all evenly to give you
tassel hoop earring a final touch.
For an earring hook:
When you hold the set of strings
from the center and fold them into halves, the end which you hold from is where
you will tie a strong knot with a single thread, and wrap the edge together in
an opposite direction to the set of strings. You can attach this tassel to the
hook you already have and your tassel earring is ready to be used.
You can watch the videos shared
on today’s blog which show you something similar to the DIY craft I have been
talking about. Disclaimer: These videos do not belong to the Crafty Blogger and
we do not take any credit for the creativity displayed by the amazing video
bloggers.
I hope you all enjoyed reading
today’s blog and would love to read more from us. Time for me to sign off now,
until next time, stay crafty.


Comments
Post a Comment